*This article by INSTALL executive director David Gross was originally featured in ProInstaller Magazine.
Mastering Carpet Tiles: Tips for Flawless Installation in Large Commercial Spaces
Carpet tile has come a long way in its design and engineering, offering an abundance of new patterns and installation advantages including better backing systems, more versatile adhesives and alternative fastening systems. Despite these advances, installers can still get tripped up on the job, especially in large commercial spaces such as hospitality environments, hotels and casinos with lengthy sightlines. With complex patterns and long visual repeats, even a small misalignment, rotated tile or off-grid placement can become highly visible.
This article breaks down the installation process into its key phases to show where challenges typically arise and provides best practices in keeping with the Carpet and Rug Institute’s (CRI) installation standard 104.
Site Condition Assessment
Environmental conditions directly affect how carpet tiles perform. Before the first tile comes out of the carton, installers must assess jobsite stability by measuring temperature and relative humidity (RH) and comparing readings to the tile manufacturer’s specifications. If building conditions are too cold, too warm or too humid, carpet tiles may expand, contract or curl at the edges after placement. Substrate moisture and HVAC system settings can also interfere with tile adhesive bonding, leading to tile creeping or lifted corners. Even minor fluctuations in ambient conditions can make repeated patterns or seams shift, visually disrupting long spans.
Best practice: First, check the tile manufacturer’s recommendations for temperature and RH to establish target ranges, and test jobsite conditions to confirm they fall within the prescribed range. For large spaces, take readings in multiple locations including near exterior walls, HVAC vents and any areas exposed to drafts or direct sunlight. If readings fall out of range, take corrective action such as adjusting the HVAC system, mitigating moisture or adding moisture if humidity is too low. Following any action, allow the jobsite to stabilize for a minimum of 24 hours before retesting.
Acclimating Materials
Make sure to allow carpet tiles and installation materials time to adjust to the temperature and RH of the jobsite before installation begins. Although carpet tiles are manufactured to tight tolerances, they are still affected by environmental conditions. Acclimation ensures the tiles reach dimensional stability in the conditions they will be installed, helping patterns align correctly and adhesives perform as intended.
Best practice: The most common acclimation method is allowing the tiles and adhesive to sit in the conditioned installation space for 24-72 hours. Manufacturer guidelines vary regarding whether to remove the materials from the original packaging, so review them in advance and follow accordingly.
Pallet and Carton Sequencing
Even if tile cartons arrive on-site in perfect condition, the tiles themselves may present natural variations that become problematic if not properly managed during installation. Pallet and box sequencing can minimize the visual effects of these variations by organizing tiles to be installed in the same order they were manufactured. Consequently, if installers work too far out of the sequencing order, dye lots and pile heights can create shading or pattern inconsistencies that become evident once installed.
Best practice: Arrange the pallets in sequential order and mix tiles from cartons within each pallet to evenly blend design elements for optimal color and pattern aesthetics. Frequently confirm the sequence by referring to carton labels that contain organizing information such as product, color, manufacturing batch and dye lot. When removing tiles from the packaging, verify color and pattern consistency from carton to carton and inspect edges, backings and surfaces for defects. Document any irregularities and communicate them to the project manager and manufacturer.
Substrate Evaluation and Preparation
The substrate must provide a clean, flat, dry surface for tiles to seat properly and maintain consistent contact with the adhesive, and must meet relevant ASTM F710 and ASTM F2170 standards for concrete preparation and RH/moisture testing. Any substrate deficiencies increase the risk of project failures—typically in the form of imperfections telegraphed to the tile surface, misaligned joints, curling and lippage and poor adhesion. Over large commercial areas, even minor substrate irregularities can contribute to significant visible pattern drift, open joints or tile edge lift.
Best practice: Begin with a walkthrough and visual inspection of the substrate and check flatness using a laser level. Remove all contaminants including dust, debris, curing compounds and old adhesive residue. Grind down high spots and fill in low areas with a manufacturer-approved patching or leveling compound compatible with the tile adhesive. Test concrete substrates for moisture and pH using in-situ probes or concrete moisture meters to verify they meet tile manufacturer guidelines. Perform your own testing before starting the project. Do not rely on others to provide this critical data, as once installation begins you assume all responsibility. If moisture or alkalinity exceeds allowable limits, take corrective measures such as additional drying time, improved ventilation or applying an approved moisture mitigation system.
Pre-installation Planning
The architect or designer determines the exact tile layout to ensure proper directional alignment and pattern continuity. The installer sets control lines and grid points that will guide workflow and tile placement. Layout is one of the most critical steps in the process. If directional arrows are ignored or snap lines are inaccurate, tiles may be incorrectly rotated or laid askew. Additionally, hallways and breakpoints in patterns must be considered in the overall layout. Failing to account for full cartons in sequence may introduce color or pattern variations. And if not properly planned, tile joints and pattern breaks may fall within prominent sightlines or high-traffic areas, making even minor alignment or pattern inconsistencies more noticeable.
Best practice: Mark control lines and snap grid reference points on the substrate to align with the room’s sightlines and design intent. Lay out tiles in a test area to establish arrow orientation, pattern alignment and visual consistency. Check that directional arrows are consistent and properly oriented to avoid shading, striping or pattern distortion across large areas. Reserve adequate workspace for large-span test layouts, coordinating with other contractors as needed. Review the installation plan with the crew so every team member understands the orientation and sequencing.
Adhesive Selection and Application
Adhesive choice and handling are critical, as different carpet tile backings respond differently to adhesive type, tack level and open time. In large commercial environments, pressure-sensitive adhesives (PSAs) are commonly specified, but they can be unforgiving if the manufacturer’s instructions are not precisely followed. If the PSA is still wet when the tiles are placed, they may shift or creep during installation or shortly after due to rolling loads or heavy foot traffic. Conversely if the adhesive is too dry, bond strength is reduced. Incorrect trowel notch size, uneven rolling or missed adhesive coverage can also cause irregularities across large spans.
Alternatively, some tile installations utilize a locking method with an adhesive tab that does not adhere the tile to the floor. This is a specified installation, and the manufacturer’s instructions need to be carefully followed.
Best practice: First, confirm the tile backing type and verify the manufacturer’s approved adhesive and application method. Then apply the adhesive using the specified trowel or roller to achieve the correct coverage rate and film thickness. While working, closely monitor the open time and test adhesive tack before tile placement. Apply adhesive only to the amount of area that can be covered within the adhesive’s working time.
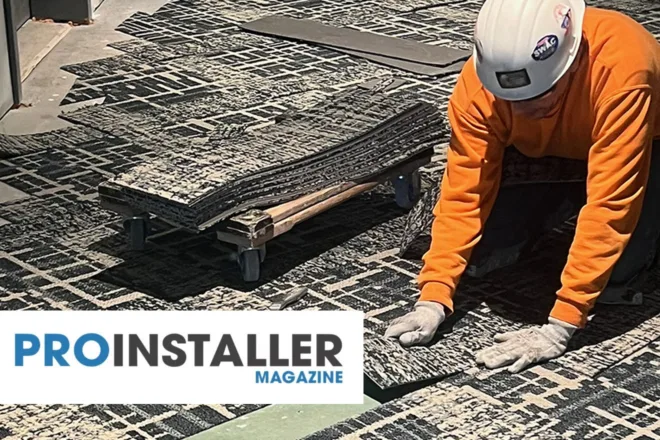
Tile Placement and Alignment
Carpet tiles should be placed into the adhesive using the control lines and the approved layout, orientation and sequencing plan. Because carpet tiles are modular, small placement errors can accumulate quickly. Common risks include drifting off the grid, inconsistent arrow orientation, pulling tiles out of sequence and pushing tiles together too tightly or leaving excessive gaps. These missteps can lead to peaking, edge compression, slight overlap or open joints that become increasingly noticeable under traffic.
Best practice: Begin tile placement at the established control lines and work outward, staying aligned with the grid at all times. Once the first tile is firmly set, lay tiles outward along both guide lines, placing them firmly into the adhesive without sliding them into place or forcing edges together. After positioning several tiles along the working lines, stair-step tiles into the field area to maintain squareness throughout the installation. Set up tiles to be installed with the proper sequence and directional orientation to save time and reduce mistakes. A small dolly pre-loaded with tile can aid quicker mobility. As installation continues, the pace of the job naturally speeds up, making it critical to maintain vigilance. Regularly step back to visually assess alignment and pattern continuity, particularly along long sightlines and in high-visibility areas. Correct any issues immediately.
Rolling, Curing and Post-installation Protection
In this final phase, installed tiles are rolled with a manufacturer-recommended roller to embed them into the adhesive and ensure uniform contact for optimal bond strength. Risks at this point include skipping a second rolling pass when indicated, applying too much or too little pressure to set the tile and allowing foot traffic or rolling loads too early. Swings in temperature and humidity during the adhesive cure time can also compromise performance.
Best practice: Roll all tiles uniformly including perimeters and transitions, and re-roll areas when required by the adhesive manufacturer. Restrict access to the floor until the adhesive has fully cured, and protect the floor with manufacturer-approved coverings if other trades must enter the space. Lastly, maintain stable temperature and humidity throughout the cure period—typically 72 hours prior to installation, during installation and a minimum of 72 hours after installation to preserve tile alignment and bond integrity.
Key Takeaways for Carpet Tile Installers
Successful carpet tile installation encompasses many steps, and it begins long before the first tile hits the floor, using three guiding principles:
-
- Plan and prepare. Patience and diligence are critical, as precision during every phase from site assessment through rolling and curing contributes to the final result.
- Follow the tile manufacturer’s guidelines. Meeting the manufacturer’s specifications for site conditions, adhesives, trowel size, open time, curing and more keeps material warranties intact and protects installers from callbacks.
- Stay up to date with training. Products and installation techniques are constantly evolving. Continuing education helps maintain mastery of industry best practices and keeps skills sharp so installers remain competitive.
By embracing these principles and following best practices, installers can deliver reputation-building carpet tile floors that are precise, durable and visually stunning.